

Starter backpacking gear: Your Essential Guide for First Trips
Getting into backpacking can feel a little overwhelming at first, but it doesn't have to be. Your starter backpacking gear really just boils down to a handful of core items that form the foundation for a safe and comfortable trip. Think of it as an exciting first step—focus on getting the right things, not absolutely everything.
Embarking on Your First Backpacking Adventure
Turning a great day hike into an overnight adventure is one of the most rewarding things you can do outdoors. But let's be honest, the sheer amount of gear out there can be intimidating. The secret is to start with a solid foundation. It's like building a house; you need to get the frame and walls up before you start picking out paint colors. Your starter gear is that essential framework.
And if you feel like everyone is suddenly hitting the trails, you're not wrong. The market for hiking gear was valued at a staggering $20.65 billion back in 2018 and is expected to hit $28.79 billion by 2026. A whole new wave of adventurers is discovering the outdoors, and you're part of it.
The Foundational 'Big Four'
At the heart of every backpacker's kit, especially for beginners, are the items we call the "Big Four." These are the heaviest and most important pieces of gear that have the biggest impact on your comfort out on the trail. Nailing these choices is your first big win.
To make it easier to understand, here's a quick breakdown of the four essential gear categories every beginner needs to prioritize.
The "Big Four" Starter Backpacking Gear Essentials
| Gear Category | Primary Function | Key Consideration for Beginners |
|---|---|---|
| Backpack | Your mobile home. It carries everything you need to survive and thrive on the trail. | Fit is everything. A pack that fits your torso correctly is more important than any other feature. |
| Shelter | Your protection from the elements. This could be a tent, a tarp, or a hammock. | Look for a good balance of weight, weather protection, and ease of setup. |
| Sleep System | Your sleeping bag and sleeping pad. These two items work together to keep you warm. | Choose a sleeping bag rated for the temperatures you expect and a pad that offers comfort and insulation. |
| Cook System | Your stove, fuel, and a pot. This is for preparing hot meals and drinks. | A simple, reliable stove is all you need. A warm meal is a huge morale booster after a long day. |
By focusing on these four core components first, you simplify the whole process. You're ensuring your basic needs for shelter, warmth, and food are covered, which is what backpacking is all about.
Of course, your gear choices will depend heavily on your trip plans. Taking some time to learn how to plan a backpacking trip is a crucial next step, as it will inform every decision you make.
Beyond the Big Four, there's another piece of gear that new backpackers find invaluable: trekking poles. Don't think of them as just sticks to lean on. They are game-changing tools that improve your balance on tricky terrain, take a huge amount of strain off your knees, and can even be used to set up some ultralight shelters. Investing in a good pair early is one of the smartest moves you can make.
Choosing Your Foundational Backpacking Gear
Alright, this is where the fun really starts. Picking out your first set of starter backpacking gear isn't just a shopping trip; it's like building your own mobile home for the wilderness. Your shelter, sleep system, and backpack are the big-ticket items that will make or break your comfort and safety out there. Getting these foundational pieces right from the get-go is the key to having a great time on the trail.
Before you dive in, it’s a good idea to get a feel for what’s out there. Checking out what experienced folks recommend can save you a lot of guesswork. See what experts consider the best camping gear to really enjoy the outdoors to get a baseline before you start making choices.
This diagram shows how these core pieces, often called the "Big Four," fit together.
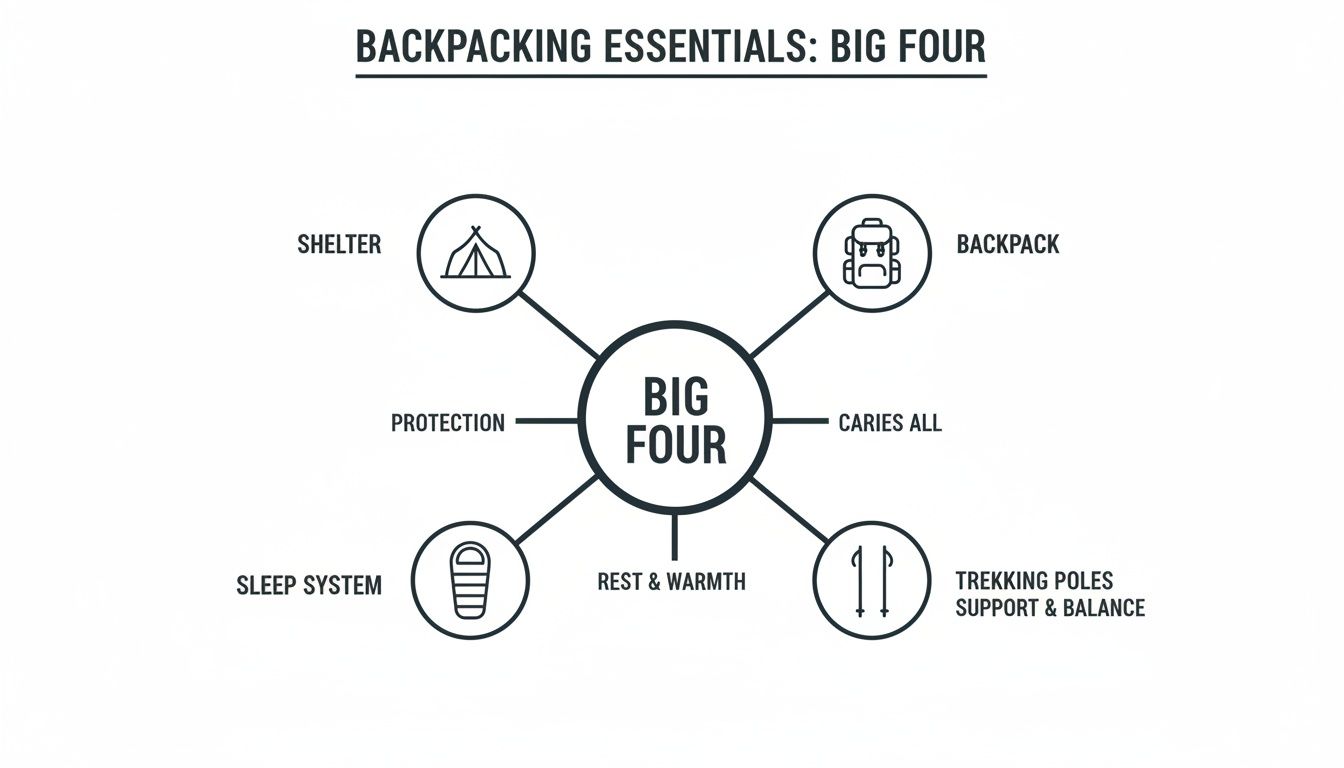
Think of your backpack, shelter, sleep system, and trekking poles as a single, interconnected unit. Each one impacts the others, and together, they form the core of your entire setup.
Selecting Your Shelter
Your shelter is your first line of defense against wind, rain, and bugs. For most people starting out, a good old-fashioned backpacking tent is the simplest and most reliable choice. They give you a fantastic blend of weather protection and a bug-free zone, and they're generally easy to set up.
- Backpacking Tents: This is the gold standard for beginners. Look for a "freestanding" model. That just means it stands up on its own with poles, so you can easily pick it up and move it to the perfect spot before staking it down.
- Hammocks: A fantastic option if you'll be hiking in forested areas. Lots of hikers swear by them for comfort, but they do have a bit of a learning curve for setting them up properly with a rain tarp and bug net.
- Tarps: This is the ultralight, expert-level choice. Tarps offer very basic protection and take a lot of practice to pitch effectively, especially when the weather turns nasty.
For a first shelter, you can't go wrong with a two-person backpacking tent. It hits the sweet spot of space, weight, and price.
Decoding Your Sleep System
A good night's sleep isn't a luxury on the trail—it's essential for your body to recover. Your sleep system has two main parts that have to work together: the sleeping bag and the sleeping pad.
A sleeping bag's temperature rating tells you the lowest temperature at which an "average" person will stay comfortable. For three-season backpacking (spring through fall), a bag rated between 20°F and 30°F (-6°C to -1°C) is a really versatile place to start.
Key Takeaway: Always pick a sleeping bag rated for temperatures a bit colder than what you actually expect. It's way easier to unzip your bag to cool off than it is to shiver all night in a bag that's not warm enough.
Next up is the insulation. You’ll be choosing between down and synthetic fill.
Down vs. Synthetic Insulation
| Feature | Down Insulation | Synthetic Insulation |
|---|---|---|
| Warmth-to-Weight | Excellent. It’s lighter and packs down smaller for the same warmth. | Good. It's a bit bulkier and heavier than down for the same temperature rating. |
| Performance When Wet | Poor. It loses all its insulating power when it gets soaked. | Good. It stays pretty warm even when it gets damp. |
| Cost | More expensive. | More affordable. This makes it a great choice for beginners on a budget. |
| Durability | Very durable. A well-cared-for down bag can last for decades. | Less durable. The insulation can break down over time from being stuffed and compressed. |
Don't forget the sleeping pad! It adds cushion, sure, but its real job is to insulate you from the cold ground. This is measured by its R-value—the higher the number, the more insulation it provides. For three-season adventures, a pad with an R-value between 2.0 and 4.0 is what you're looking for.
Finding the Perfect Backpack
Your backpack is probably the most personal piece of gear you'll own. A pack that doesn't fit right can turn a dream hike into a nightmare of sore shoulders and hips. The most important thing here is your torso length, not your height. Any good outdoor shop can measure you, but you can also do it at home with a friend and a soft measuring tape.
For a typical weekend trip (1-3 nights), a pack with 40 to 60 liters of volume will do the trick. That's plenty of room for your gear, food, and extra clothes without tempting you to overpack. If you're curious about trimming weight, our guide to building a light backpacking gear list is a great next read.
Choosing Your First Camp Stove
There’s nothing like a hot meal after a long day of hiking. When you're putting together your first kitchen, keep it simple. The go-to choice for new backpackers is a canister stove.
These little stoves screw right onto a fuel canister and are incredibly easy to use. They boil water fast and give you pretty good flame control for simmering. While you can get fancy integrated stove-and-pot systems, a basic screw-on canister stove and a small aluminum or titanium pot is all you need to start cooking up tasty meals on the trail.
How to Dress for the Trail: Your Smart Layering System
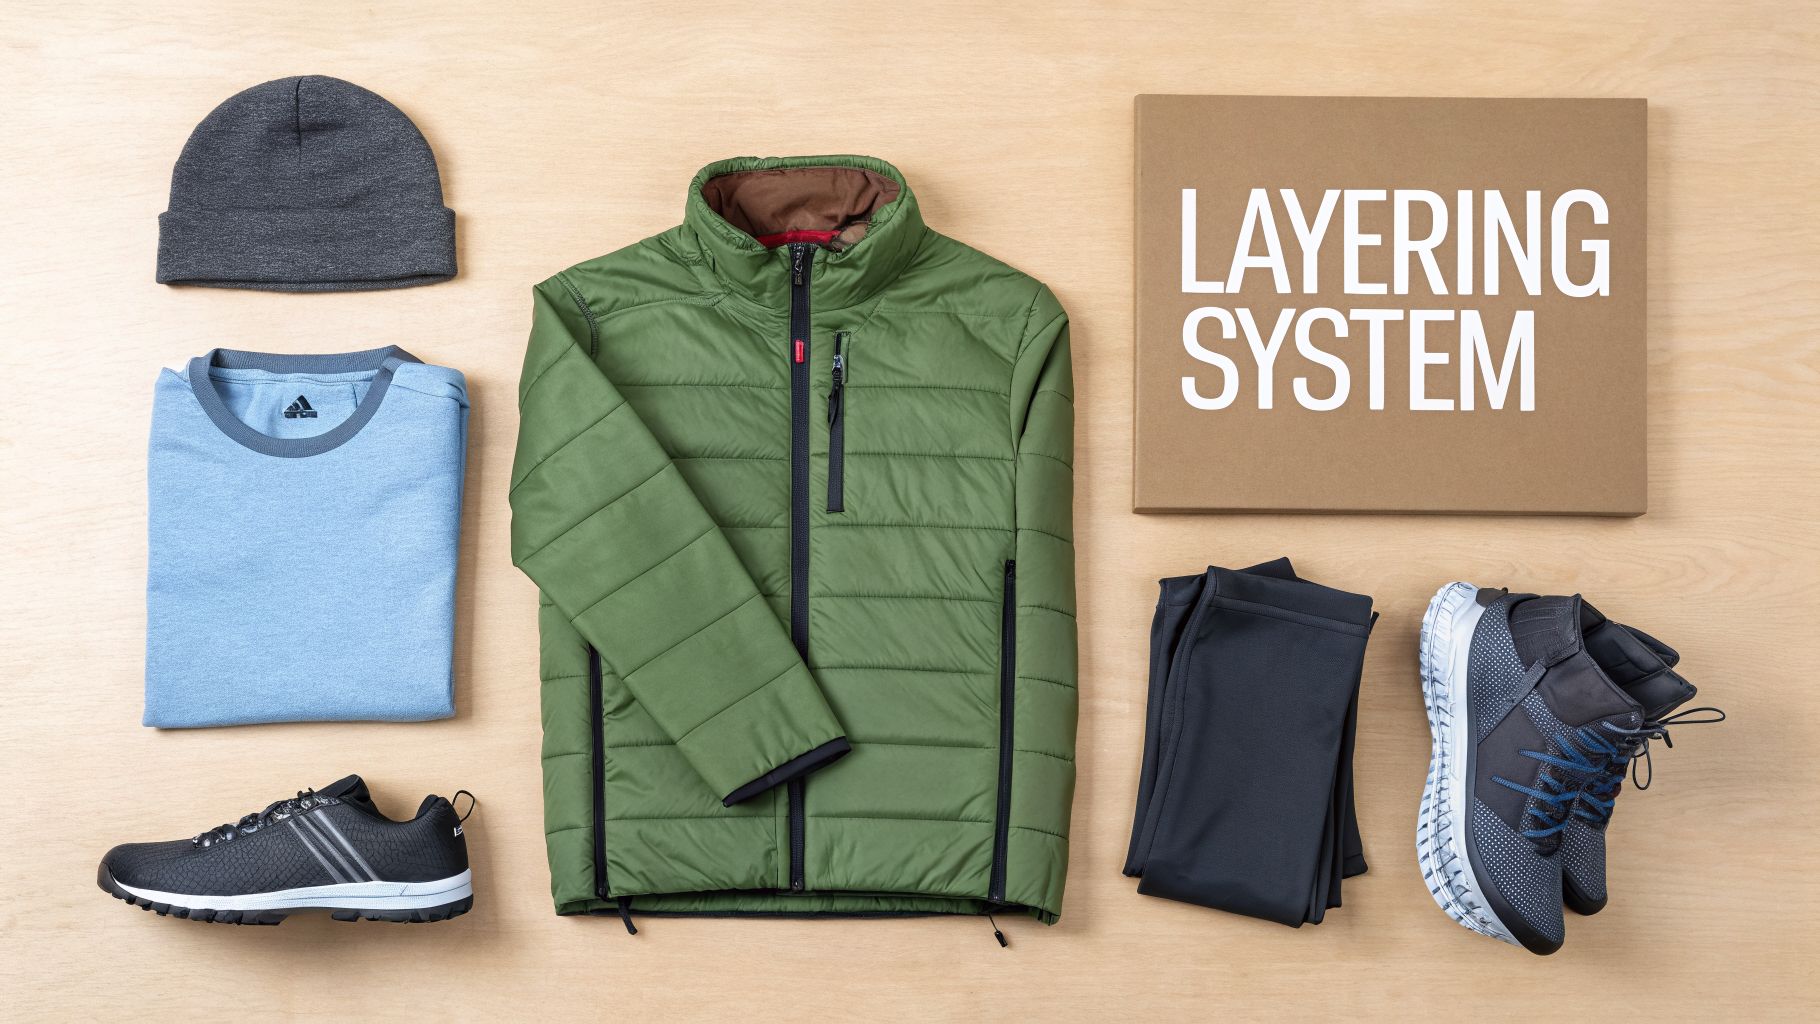
Your clothing is more than just something to wear—it's your personal, mobile shelter against the elements. A classic beginner mistake is packing a single, heavy jacket for warmth. Instead, seasoned backpackers rely on a smart layering system to stay comfortable no matter what the mountain throws at them.
Think of it like an onion. You add or remove thin, specialized layers to perfectly match the weather and how hard you're working. This simple approach is the secret to staying comfortable and safe, and it's a core part of any good starter backpacking gear list.
The Three Core Layers Explained
Your layering system is built from three distinct pieces that work as a team. Each one has a specific job. Nailing down their roles is the first step toward building a trail wardrobe that keeps you warm when you're still and cool when you're moving.
-
Base Layer (The Wicker): This is the layer right against your skin. Its only job is to pull sweat away from your body to keep you dry. This is critical—being wet is the fastest way to get dangerously cold on the trail.
-
Mid-Layer (The Insulator): Worn over your base layer, this is your primary warmth. It's designed to trap your own body heat, creating a cozy pocket of warm air. Classic examples are a fleece or a puffy jacket.
-
Shell Layer (The Protector): This is your outermost shield. It protects you from wind and rain, keeping your other layers dry so they can do their jobs.
This system gives you total control. You can wear just the base layer on a strenuous, sunny climb, add the mid-layer when you stop for a break, and then throw the shell on top if the wind picks up or it starts to rain.
Why "Cotton Kills" on the Trail
You'll hear the phrase "cotton kills" from every experienced hiker, and it's not an exaggeration. Cotton is great for everyday life, but it's a huge liability in the backcountry. Once cotton gets wet from sweat or rain, it loses all its insulating ability and takes forever to dry.
Crucial Concept: A wet cotton shirt will actively suck heat away from your body, even on a mild day. This dramatically increases your risk of hypothermia, a dangerous condition where your body loses heat faster than it can produce it.
Instead, all your hiking clothes should be made from materials that manage moisture and keep you warm even when they're damp.
- Merino Wool: This natural fiber is a trail superstar. It’s fantastic at wicking moisture, naturally resists odors, and—most importantly—continues to insulate even when wet.
- Synthetics (Polyester, Nylon): These fabrics are champions of wicking moisture and drying incredibly fast. They're also super durable and usually more affordable than merino wool.
Your Clothing Checklist for a 3-Day Trip
You don't need a massive wardrobe for a weekend trip. The goal is a small, efficient set of pieces that can handle multiple jobs. For a typical trip in moderate, three-season weather, this is a great place to start.
Hiking Clothes (What you'll wear):
- Hiking Shirt: 1 (merino wool or synthetic)
- Hiking Shorts or Pants: 1 (quick-drying synthetic)
- Hiking Socks: 1 pair (wool or synthetic)
- Hiking Shoes/Boots: 1 pair
Packed Clothes:
- Rain Jacket: 1 (waterproof/breathable shell)
- Rain Pants: 1 (waterproof/breathable shell)
- Insulating Jacket: 1 (down or synthetic "puffy" jacket)
- Fleece or Long-Sleeve Shirt: 1 (for extra warmth or to sleep in)
- Hiking Socks: 1-2 extra pairs
- Underwear: 1-2 extra pairs
- Beanie/Warm Hat: 1 (for cold evenings and mornings)
- Gloves: 1 light pair
Sticking to this simple list gives you a versatile system that keeps you ready for almost any weather without weighing down your pack.
Mastering the Ten Essentials for Safety and Peace of Mind
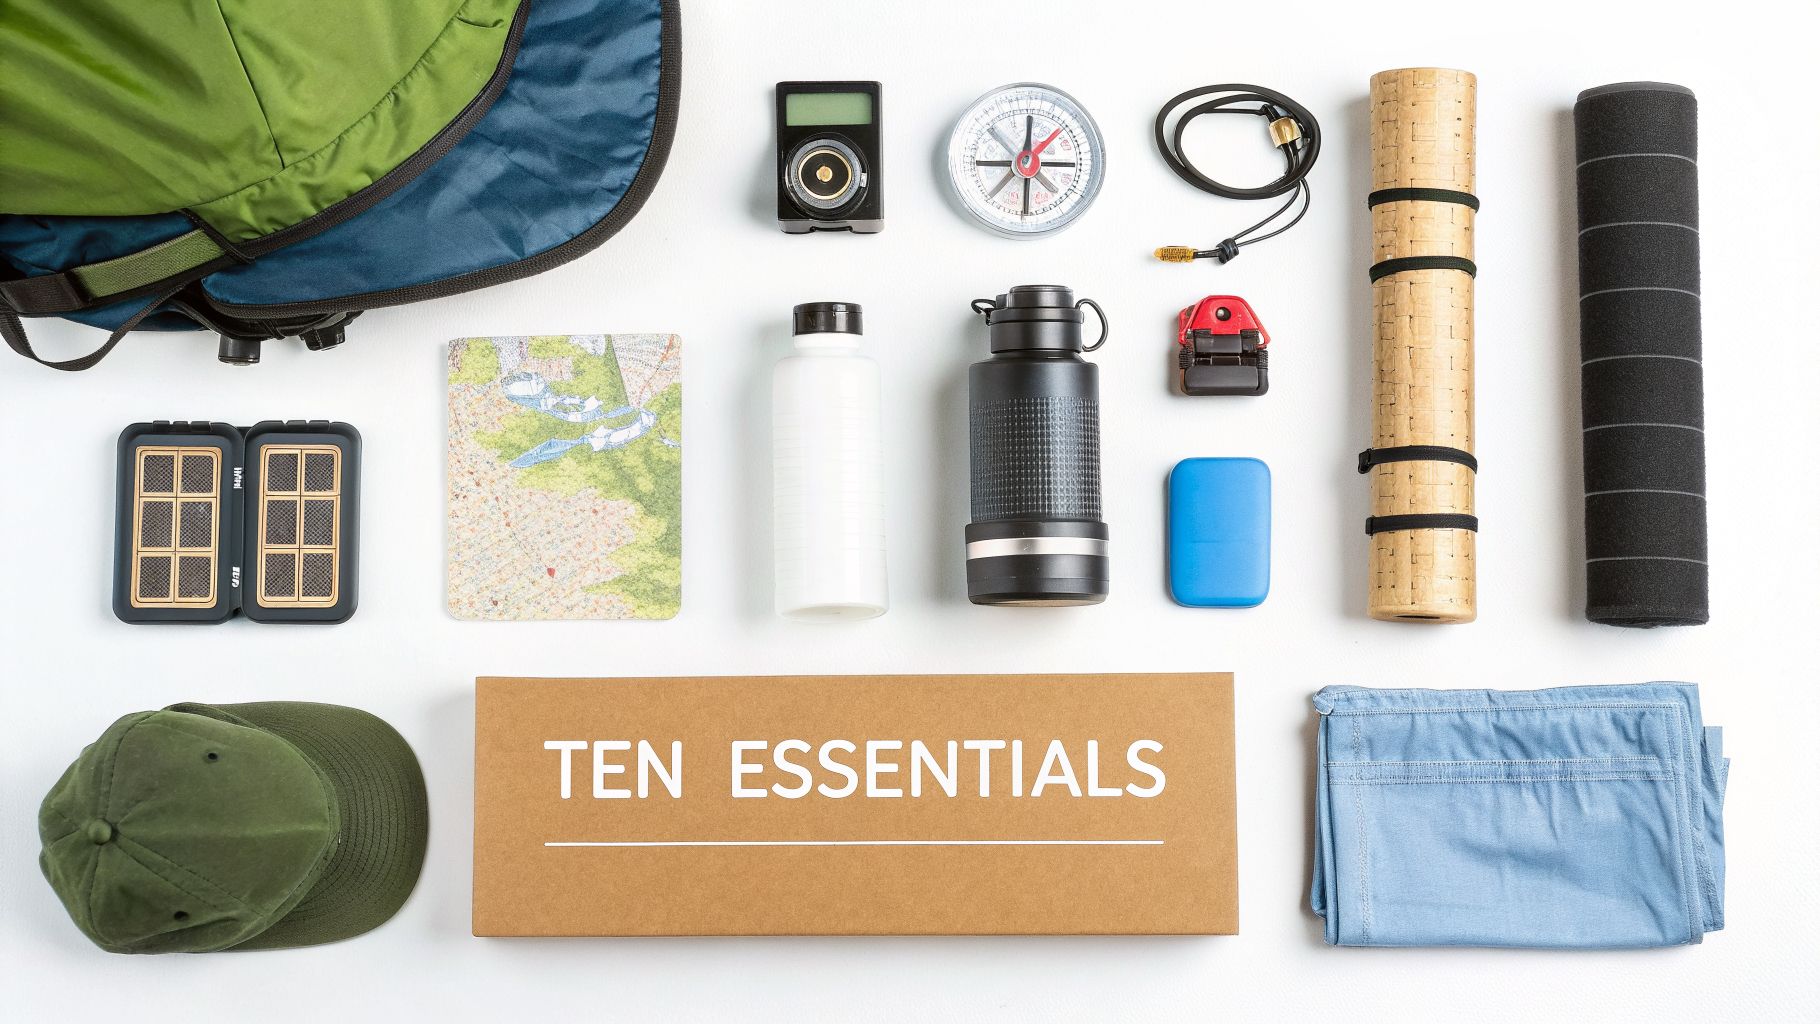
While your backpack, shelter, and sleep system are the core of your comfort on the trail, another group of smaller items—the "Ten Essentials"—forms the core of your safety. Don't think of this as a scary list of emergency gear. Instead, see it as a toolkit that builds confidence. Having these items can turn an unexpected challenge from a trip-ender into just a story you tell later.
This isn't about packing ten specific things; it's about covering ten crucial functions. Getting this system down is a rite of passage for every backpacker. It's what gives you the peace of mind to handle common trail problems with a cool head.
The Modern Ten Essentials System
The original list has evolved over the years from a simple checklist into a more functional system. Instead of just "map and compass," for instance, the category is now "Navigation." This simple shift helps you think about the purpose behind each item in your starter backpacking gear kit, which is far more useful.
Here’s a breakdown of the ten systems and what they typically include:
- Navigation: A physical map and a real compass are your non-negotiable backups. For primary navigation, most people now use a GPS device or a phone with offline maps (and a power bank to keep it charged).
- Headlamp: Always, always bring a headlamp and extra batteries. Being hands-free is so much better than a flashlight for everything from late-night cooking to finding your way if a hike takes longer than planned.
- Sun Protection: This means sunglasses, a sun hat (preferably with a wide brim), and broad-spectrum sunscreen. Sunburn and sunstroke can sneak up on you and ruin a trip, even on cloudy days.
- First-Aid: Start with a pre-made backpacking first-aid kit, then customize it. Add personal medications and plenty of blister care like moleskin—you'll thank yourself later.
- Knife: A simple multi-tool or a reliable knife is indispensable for gear repair, food prep, and a thousand other little tasks you can't predict.
- Fire: You need at least two ways to make fire. Pack waterproof matches, a simple lighter, and maybe a fire starter. Redundancy is key when you need to get a fire going for warmth or signaling.
- Shelter: Even if you're just out for the day, toss an emergency space blanket or a bivy sack in your pack. It weighs next to nothing and can be an absolute lifesaver if you get stuck out overnight unexpectedly.
- Extra Food: Pack at least one extra day's worth of food. Stick to calorie-dense, no-cook items like energy bars, dried fruit, or nuts.
- Extra Water: Carry more water than you think you’ll need, and always bring a reliable way to treat more, like a water filter or purification tablets.
- Extra Clothes: A dry pair of socks and an extra warm layer (like your puffy jacket) are non-negotiable. Getting wet when the temperature drops is a fast track to a dangerous situation.
Why Each System Matters
Understanding the "why" behind each of these essentials is what truly prepares you. That little water filter isn't just about making stream water taste better; it's about preventing a nasty bug like giardia that can end your trip in a hurry. That flimsy emergency blanket isn't for comfort—it's to prevent hypothermia, which can happen in temperatures as high as 50°F (10°C) if you're wet and exposed to the wind.
It’s no surprise that the demand for reliable starter backpacking gear, including these essentials, is on the rise. This follows a larger trend in the camping market, which is projected to grow from $22.4 billion in 2026 to $39.4 billion by 2035. Since 2020, we've seen a 47% increase in beginners hitting the trails, and they're smartly looking for durable, functional gear. You can learn how the camping equipment market is expanding and see these trends for yourself.
Expert Insight: Being prepared isn't about planning for the worst-case scenario. It's about giving yourself options. When your headlamp dies and you calmly pull out spare batteries, or you clean a small cut before it gets infected, you aren't just surviving—you're thriving. That's the confidence that turns a first-timer into a lifelong backpacker.
Building Your Kit
You don't need to go out and buy the most expensive version of every item on this list. Start with a solid, pre-made first-aid kit. Toss two mini-Bic lighters in your pack instead of a fancy storm-proof one. The goal is to have functional, reliable tools that cover all your bases.
As you get more trips under your belt, you’ll start to tweak and upgrade your Ten Essentials kit. But you'll never leave it at home. It’s the signature of a smart, self-reliant backpacker.
Why Trekking Poles Are Your Secret Weapon
If you're new to backpacking, you might glance at trekking poles and think they're an optional extra—gear reserved only for "serious" hikers climbing epic mountains. That's one of the most common myths on the trail. In truth, trekking poles are one of the single most useful pieces of starter backpacking gear you can get your hands on.
Forget thinking of them as simple walking sticks. A better way to see them is as a four-wheel-drive system for your body. On a perfectly flat, paved path, you might not feel a huge difference. But the second the trail gets tricky—think steep inclines, slippery creek crossings, or uneven, rocky terrain—they become your best friends for balance, stability, and saving energy.
Reducing Impact and Boosting Endurance
Every single step downhill sends a jolt of force right into your knees. After a few thousand steps, that impact really starts to add up, leading to sore joints and next-day aches. Trekking poles are like a personal suspension system, transferring a huge amount of that stress from your legs to your arms and shoulders.
In fact, studies have shown that using poles can slash the compressive force on your knees by as much as 25%. This isn't just about feeling less sore after a long day; it’s about protecting your joints so you can enjoy hiking for years to come.
By getting your upper body involved, you spread the workload around. Your legs don't have to do all the work, which means less fatigue and more gas in the tank to go farther. For anyone just starting out, that boost in stability and endurance is a massive confidence builder.
More Than Just Hiking Sticks
The benefits of modern trekking poles go way beyond the trail. Their smart design has caught the eye of professionals in other fields, cementing their role as a true mobility tool.
For instance, physical therapists now recommend poles for 68% of knee rehab cases instead of old-school crutches. They point to benefits like 40% better gait stability and how easy they are to carry, which helps everyone from snowshoers to individuals with Parkinson's. This data, which you can explore further by reviewing the latest camping equipment market insights, proves just how effective they are.
Expert Insight: "We recommend trekking poles to our patients because they encourage an upright posture and a more natural walking motion compared to a single cane, which can cause a user to hunch over. For anyone recovering from an injury or simply needing extra support, poles offer a stable, confidence-inspiring way to stay active." - Licensed Physical Therapist
A quality pair of trekking poles is surprisingly versatile, proving useful for far more than just summiting peaks. Their benefits extend to a wide range of people and activities, making them a smart investment for anyone who spends time on their feet.
Trekking Pole Use-Cases Beyond the Trail
| User Group | Primary Benefit | Key Feature |
|---|---|---|
| Day Hikers & Trail Runners | On-demand support | Collapsible design packs small for vests or daypacks. |
| Seniors & Daily Walkers | Improved balance & posture | Ergonomic alternative to a cane, promoting stability. |
| Hunters | Stability on rough terrain | Can double as a monopod to steady a rifle for a shot. |
| Physical Therapy Patients | Gait training & rehab | Lightweight and portable for mobility exercises. |
This table just scratches the surface of how a simple pair of poles can improve stability and confidence across different lifestyles.
Choosing the Right Poles for You
When you're picking out your first pair of poles, two features matter more than anything else for a new backpacker: they need to be lightweight and collapsible. If your poles are heavy and awkward, you'll end up leaving them at home. You want a pair that feels like a natural extension of your body, not a burden.
This is where Z-style folding poles, like the ones we make here at Hiker Hunger Outfitters, really stand out. Unlike the older, clunky twist-lock poles, they break down into a compact "Z" shape. This makes them incredibly easy to toss in your pack or strap to the outside when the trail flattens out.
A smart, packable design is a game-changer. Investing in a quality pair of trekking poles is one of the best moves you can make as you get into hiking.
If you want to take a closer look at the different types, our guide on how to choose the right trekking poles for your hiking style breaks it all down. They truly are a secret weapon that saves your joints, boosts your confidence, and makes every adventure a little bit easier.
Balancing Your Budget with Pack Weight
When you start putting together your first starter backpacking gear list, you'll run into the classic hiker's dilemma: the battle between cost and weight. It's a frustrating truth of the outdoors—the lighter the gear, the more it usually costs. This forces every new backpacker to make some tough calls right out of the gate.
A good way to think about it is the "pick two" rule of backpacking gear. You can usually have two of the following: lightweight, durable, or cheap. Finding a piece of equipment that nails all three is next to impossible. This is where you learn to be smart with your money.
Where to Invest and Where to Save
The secret is to put your money where it counts the most—on the items that have the biggest impact on your pack weight and comfort. The heaviest things you'll carry are almost always your shelter, your sleep system, and the backpack itself. These "Big Three" are where a smart investment can make a world of difference on the trail.
For instance, a budget two-person tent from a big-box store might weigh six pounds and run you about $150. In contrast, an ultralight tent made with high-tech fabrics could weigh under two pounds but easily cost $400 or more. Dropping four pounds is a huge deal you'll feel with every single step, but it comes with a serious price tag.
On the other hand, there are plenty of spots where you can save a buck without adding much weight.
- Cook System: A simple aluminum pot does the job just as well as a fancy titanium one, and the weight difference is only a few ounces.
- Clothing: You don't need expensive, brand-name apparel. Just focus on finding the right materials (like synthetics or merino wool) from more affordable brands.
- Small Accessories: Things like headlamps or first-aid kits can be found at great prices without compromising on reliability.
Key Takeaway: Prioritize spending on your "Big Three"—your pack, shelter, and sleep system. This is where investing in lighter gear provides the greatest return in comfort. Save money on items where the weight difference is minimal.
Avoiding the 'Buy It Twice' Trap
It’s really tempting to just buy the cheapest gear you can find for your first trip, but that plan often backfires. Inexpensive equipment is often less durable and might not hold up when you really need it. This leads to the classic "buy it twice" mistake: you buy the cheap item, it breaks or is horribly uncomfortable, and you end up buying the better, pricier version you should have gotten from the start.
Investing in quality, durable gear right from the beginning saves you money and headaches down the road. A well-made backpack might cost more upfront, but it could last you a decade of adventures. As you build out your kit, learning how to pack a hiking backpack correctly will also help you get the most out of whatever gear you have. Ultimately, finding the right balance for your budget is about making smart choices that match your long-term hiking goals.
Your Starter Backpacking Gear Questions Answered
Alright, even after you’ve gone through the gear lists, a few questions are probably still rattling around in your head. That's totally normal. Getting those final doubts cleared up is often the last step you need to feel confident enough to actually get out there.
Let's tackle some of the most common questions we hear from new backpackers. Think of this as a quick chat with a trail-worn friend before your first big trip.
How Much Should My Loaded Backpack Weigh?
For your first few trips out, a fantastic goal is to keep your fully loaded pack at or below 20% of your body weight. If you weigh 150 pounds, that means your target is a 30-pound pack—and yes, that includes all your gear, food, and water.
Sticking to this simple rule of thumb is one of the best ways to make sure you're comfortable and safe, not just struggling under a heavy load. As you get more miles under your belt, you’ll naturally figure out what you can leave behind and where lighter gear might be worth the investment.
Pro Tip: Don't just guess what your pack weighs. Actually weigh your fully packed bag on a bathroom scale before you leave home. It’s the only way to know for sure if you’ve overpacked and it gives you a chance to make cuts before you hit the trail.
Do I Really Need Hiking Shoes or Can I Use Sneakers?
Your trusty sneakers might be fine for a short walk on a paved path, but for backpacking, dedicated hiking shoes or trail runners are a non-negotiable investment. It really comes down to two things: support and traction.
Hiking-specific footwear is built with aggressive tread to grip onto slippery rocks, loose dirt, and slick mud. More importantly, they provide the stiffness and ankle support you need to prevent a nasty sprain when you're carrying the extra weight of a pack. Think of them as insurance for your feet and ankles.
What Is the Best Way to Pack My Backpack?
Packing your backpack is all about two things: balance and accessibility. It's a bit like a game of Tetris with a purpose.
Start by stuffing your lightest, bulkiest items at the very bottom. Your sleeping bag is the perfect candidate for this spot.
Next, place your heaviest gear—like your food bag, water reservoir, and stove—in the middle of the pack and as close to your spine as possible. This creates a stable center of gravity that keeps the pack from pulling you backward.
Finally, anything you'll need easy access to during the day (like your rain jacket, snacks, water filter, and map) should go at the very top or in the outside pockets.
At Hiker Hunger Outfitters, we believe that the right gear builds confidence for any adventure. Our lightweight, collapsible trekking poles are designed to provide the stability and support you need to explore with ease. Check out our full collection of premium and affordable hiking poles at https://www.hikerhunger.com.